How to Enable XMP Files in Adobe Lightroom
I have visited a lot of clubs and run lots of workshops showcasing my post-processing technique and from the feedback received, one of the most useful tips that people have learned is the ability to make Adobe Lightroom create XMP files alongside the images.
What are XMP files?
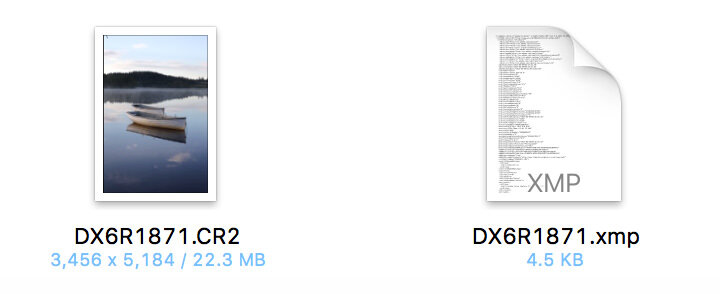
If you shoot in RAW then you will notice that once you edit your RAW files or even tag your images and sort/rate them, a new file is created alongside your image with the extension of XMP. This file is an XML file but essentially it contains information relating to the RAW file of the same name e.g. DX6R1871.XMP relates to DX6R1871.CR2 (or DX6R1871.NEF if you own a Nikon). If you were to look inside it using a suitable editor, you will see it contains EXIF/IPTC information and also details of what you set each of the sliders to when processing your RAW file.
Have you ever wondered when you opened a previous edited RAW file, how all your settings from the last time you edited the image were back? Well, because of the existence of that XMP file. Some software, such as in this case Lightroom store all this information with their own catalog or database so the XMP files do not get written alongside the image as the software saves all this information.
Why do I need them?
Well the most important point would be to save all your settings and more importantly in a way that will work with other software. What if you were somewhere where you wanted to continue working on an image but did not have Lightroom available or decided you were now going to switch to another tool you now prefer? What if you wanted to send someone your RAW file so that they could see your settings and exactly what was done to an image, e.g. a photo competition which wanted to see your changes to the file? There could be many reasons you would want to keep your RAW edits available in more than one software.
At the very least, you have a backup of your RAW images and your edits to them contained in this XMP file. As long as the XMP file is available next to the RAW image you will see your settings and if you renamed the file to something else or moved it temporarily to another area you can see your RAW file before any changes.
From feedback at my sessions, most people appreciate the advantages of the XMP files but believed this option was not possible if you used Lightroom - you were just restricted to having to use Lightroom but this is not the case.
Drawbacks
Well the biggest drawback is having lots of file, if you have 100 RAW files then the directly will now have 200 files as there will be an XMP for every image potentially. Although these file are relativity small, they all add up but in my opinion if you have gigabytes of data for your RAW files then a few megabytes for XMP files is not a large overhead.
Some people have reported that enabling this setting means their Lightroom runs much slower overall but being honest, I have never had this issue nor any other issues with Lightroom regarding performance so am unable to comment. You can always switch the setting off again if you wished.
How to enable the files
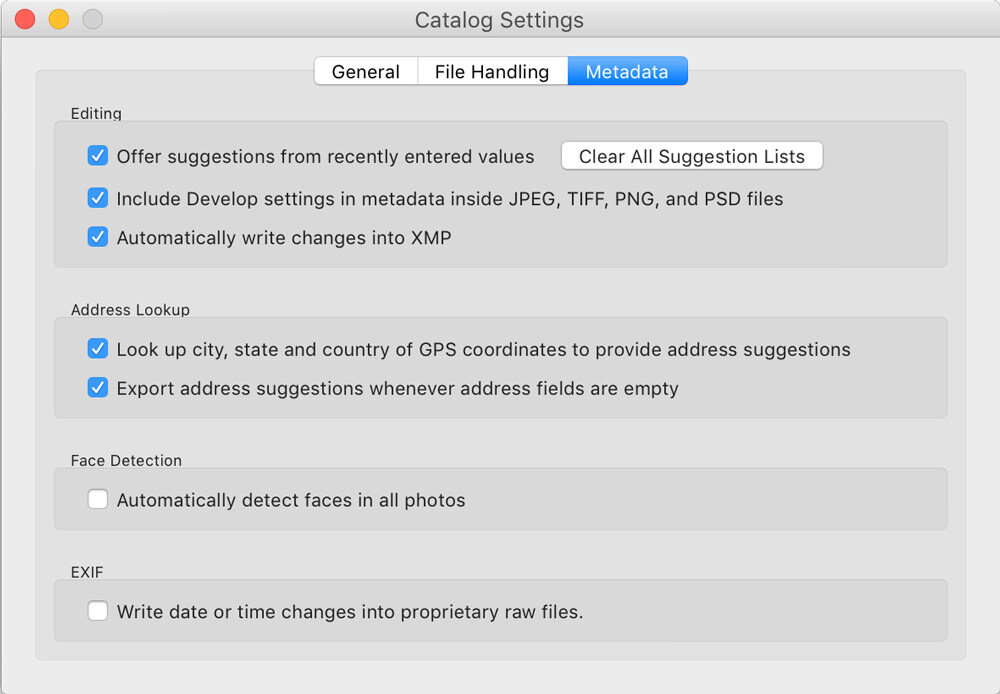
Enabling the setting is very simple, you just go to your main Lightroom menu and choose Catalog Settings and then the Metadata tab. Tick the checkbox for 'Automatically write changes into XMP'. This is how it looks on a Mac but will be similar on a PC.
What about my old images?
Any images contained within your catalog will slowly go back and start writing out the XMP files alongside any old images so it may take some time if you have a large number of images so just bear with it and it will carry on in the background.
I hope that this tip has been useful and hopefully I will continue to share more in the future based on the questions I have received over the years from people seeking advice.


